To create a Button linking directly to an E-commerce Category
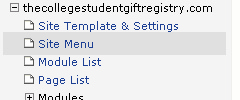
1. Use your left navigation menu to go and select Site Menu
2. Find the Add Menu Item form. It should be at the top of the page and look like this:
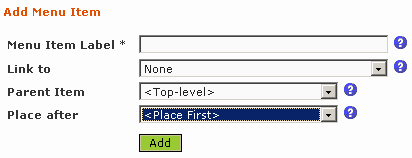
3. Enter the Menu Item Label
![]()
4. Choose E-Commerce Category

5. Click the <None> link to specify the Category

6. You will see a pop-up dialog box like this:

Select the appropriate E-commerce Module, Page and then click on the Category in the list that you would like to link your button to.
7. Click the ![]() button at the bottom of the page to save your selection.
button at the bottom of the page to save your selection.
8. Using the Parent Item menu, choose the Parent item you wish to place your new menu item under.

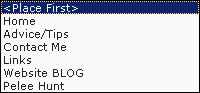
9. Chose the Place After menu button. Choose <Place First> if you would like this item at the top of the list.
10. Click the ![]() button to add the menu item.
button to add the menu item.
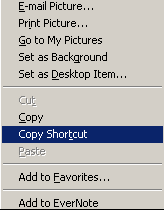
TECH TIP - To find the actual link path preview your site right-click the mouse on the newly created menu item and choose Copy Shortcut. This will store the full link URL in your clipboard. You can now paste it anywhere you like.